Key Takeaways
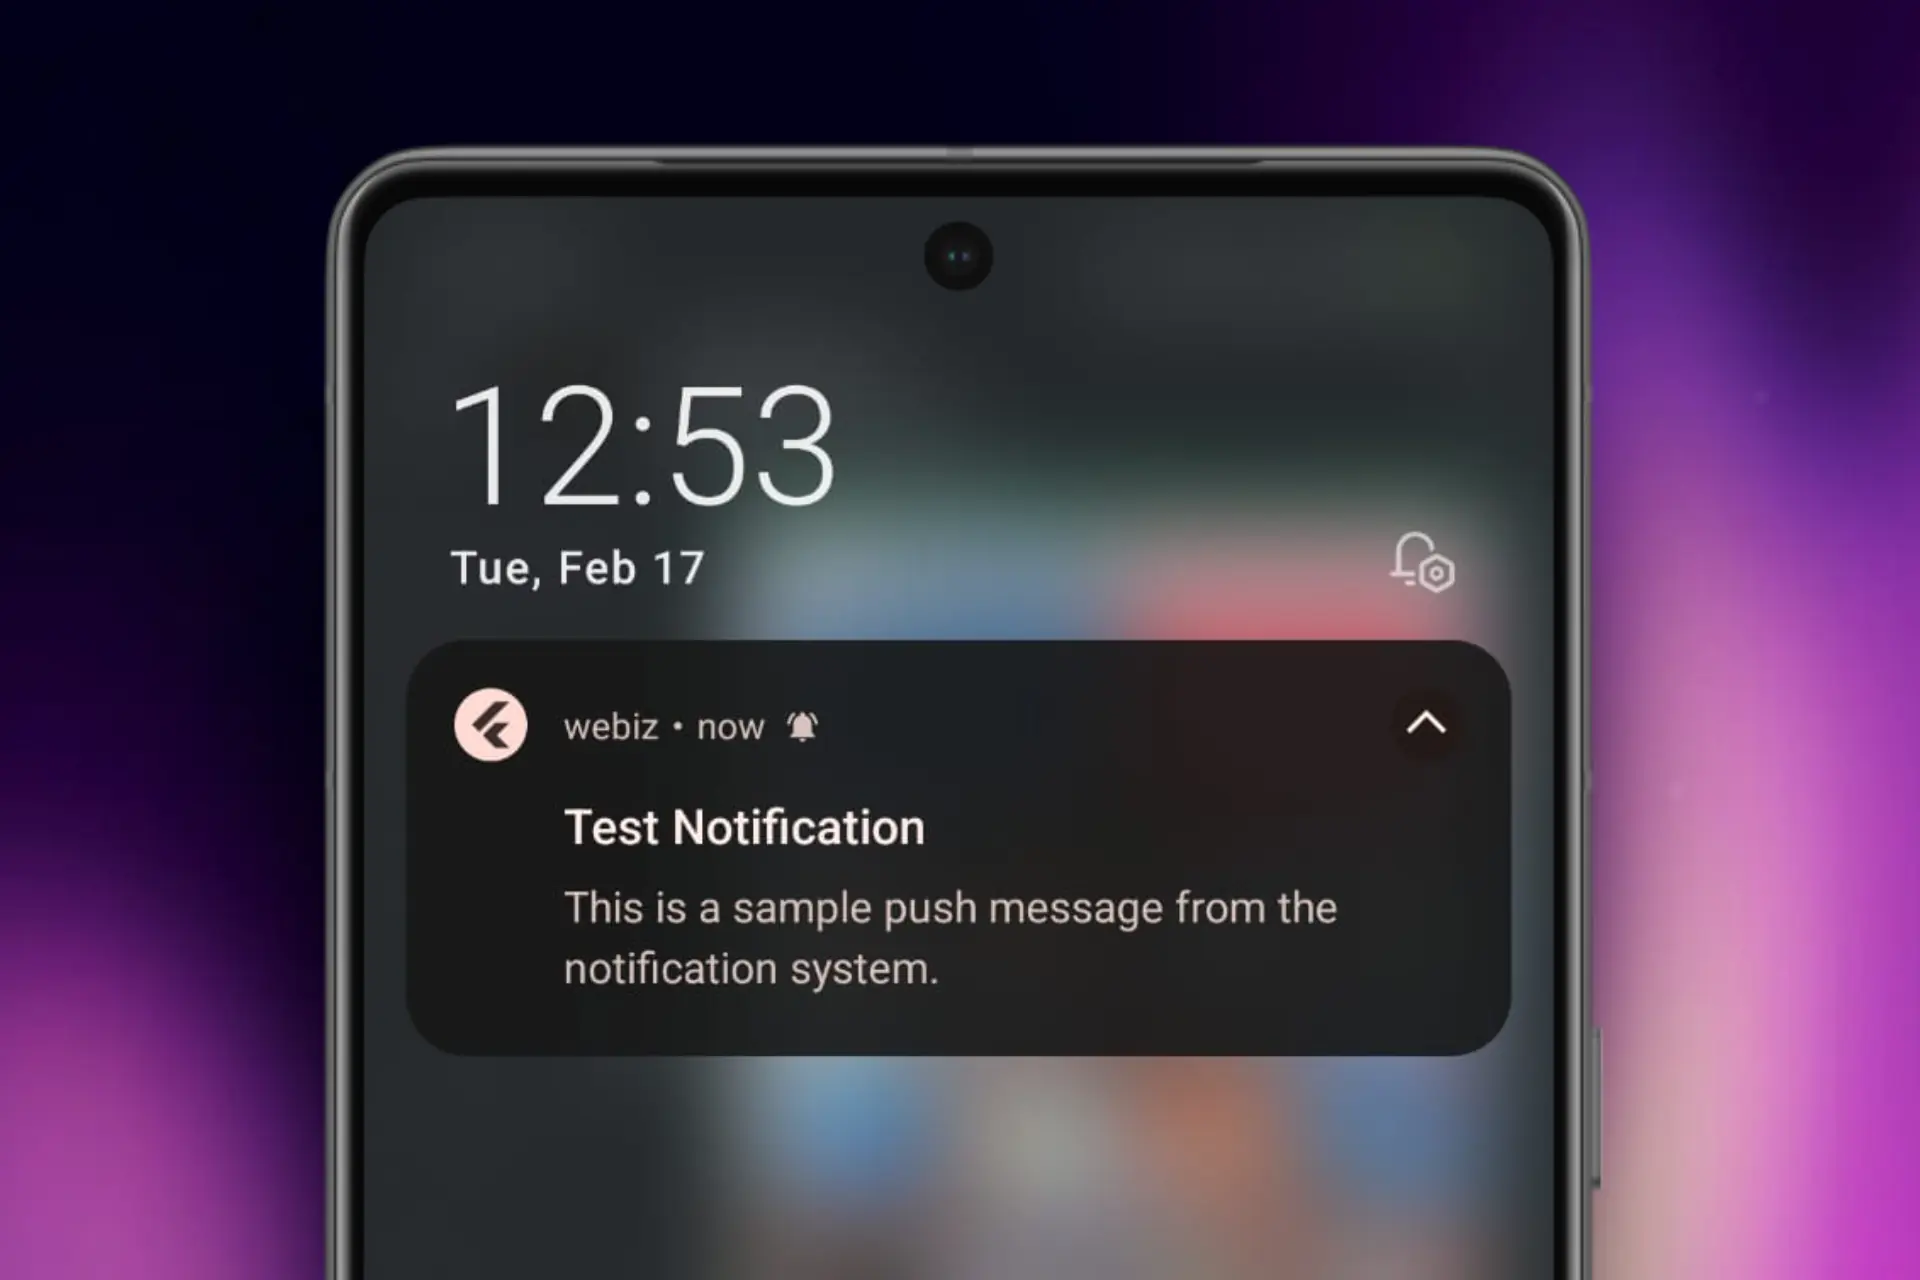
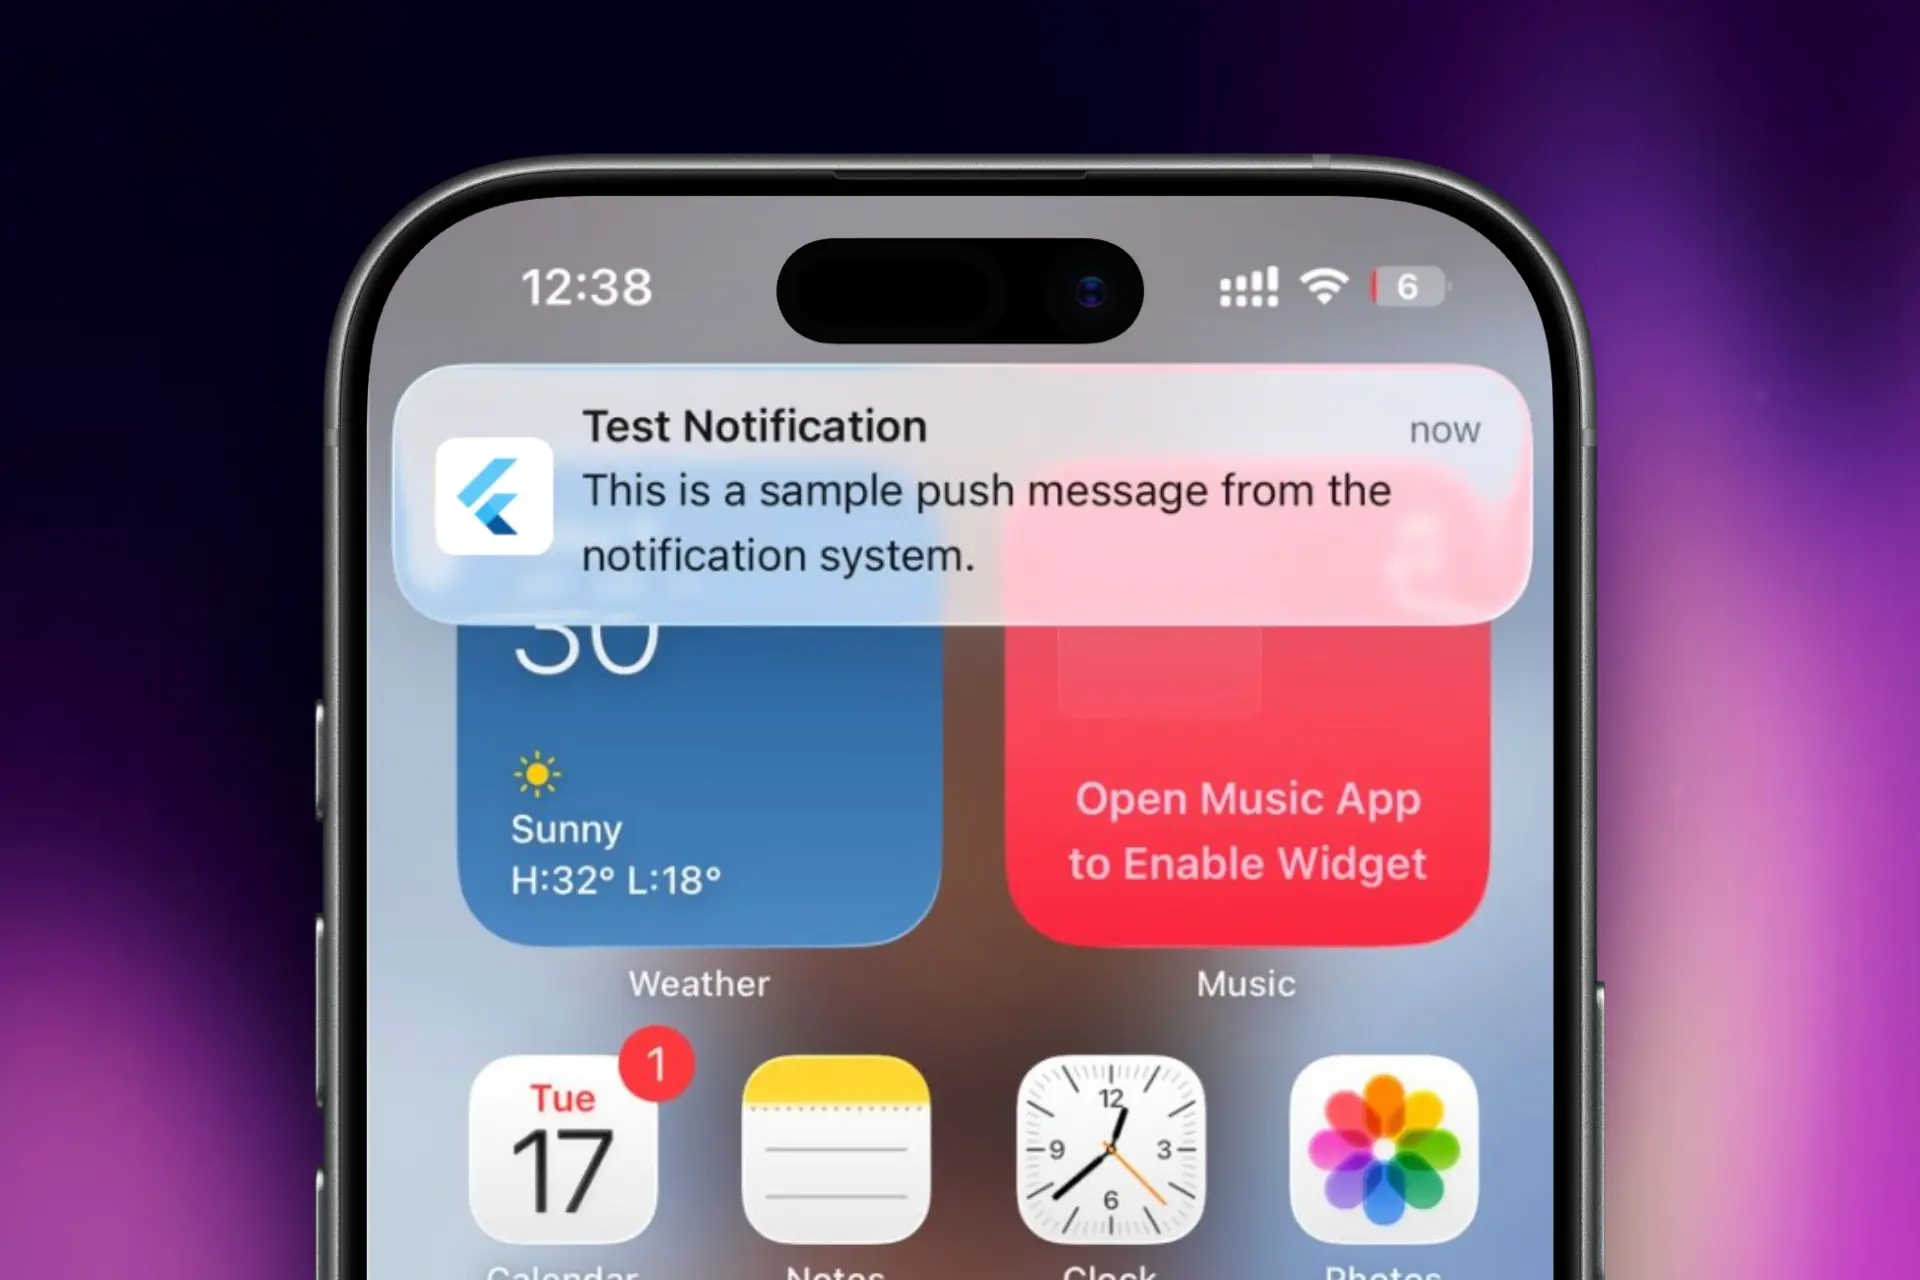
Push notifications deliver timely, real-time updates even when the app is closed, creating instant feedback loops and a responsive product.
Cross-platform parity matters: iOS has stricter rules, so handle permissions, token/APNs setup, payloads, and foreground vs background behavior.
For FlutterFlow production, keep push logic server-side: FlutterFlow collects tokens & shows foreground alerts; Supabase stores/cleans tokens and Edge Functions send via FCM.
Why Push Notifications Matter in Modern Mobile Apps
Push notifications are an essential means of communication between your product and its users; they are more than just pop-up messages. Users expect timely updates without having to open the app all the time in today's app ecosystem. Push notifications allow for instant feedback loops, whether it's a booking update, payment confirmation, or system alert.
Real-Time Communication Beyond the App
Push notifications function even when the application is closed or running in the background, in contrast to in-app messages. They are therefore necessary for event-driven systems. Without requiring users to be actively using the app, backend operations like status updates, scheduled tasks, or user-specific triggers can instantly alert users.
This feature is particularly crucial for FlutterFlow applications. Although FlutterFlow is excellent at creating user interfaces quickly, apps stay passive in the absence of a robust push notification system. A static app becomes a responsive system with push notifications.
Why Android & iOS Parity Is Critical
The notification models of iOS and Android are essentially different. Whereas iOS imposes stringent permission and delivery guidelines, Android offers greater flexibility in background execution. On iOS, push notification systems that are not specifically made for both platforms frequently function "sometimes," which results in silent failures.
Because users don't care about platform differences, parity is important. They anticipate constant conduct. Production applications need to specifically manage:
Permission flows
Token generation
Platform-specific payloads
Foreground vs background behavior
Push Notifications in FlutterFlow Production Apps
Although FlutterFlow abstracts UI complexity, backend orchestration is still necessary for push notifications. Tokens must be gathered safely, verified, appropriately stored, and utilized by a backend system that manages the timing and method of notifications. Building that proper backend-first architecture is the main goal of this guide.
Core Technologies Behind the Push Notification System
A dependable push notification system is an orchestration of several parts, each with a distinct function, rather than a single service.
FlutterFlow – Frontend & Device Integration
FlutterFlow is responsible for everything that happens on the user’s device. This includes:
Requesting notification permissions
Initializing Firebase on the client
Fetching FCM tokens
Handling foreground notifications
FlutterFlow does not send push notifications directly, and that’s a good thing. Client-side push delivery is insecure and unsuitable for production.
Firebase Cloud Messaging (FCM) – Delivery Engine
The delivery network is Firebase Cloud Messaging. It manages retries, distributes FCM tokens, routes messages to devices, and guarantees that messages get to iOS and Android devices.
Firebase is strictly a transport layer and should not be used for business logic. Maintainability is increased and coupling is decreased by keeping Firebase lean.
Supabase – Backend Orchestration Layer
Supabase acts as the control center. It:
Stores device-level FCM tokens
Filters invalid or expired tokens
Determines when notifications should be sent
Securely communicates with Firebase via Edge Functions
By using Supabase Edge Functions, Firebase Admin credentials never touch the client.
Apple Push Notification Service (APNs) – iOS Requirement
For iOS, Firebase must authenticate with Apple’s APNs. This requires uploading an APNs Authentication Key (.p8) into Firebase. Without this step, iOS notifications will fail silently, even if everything else appears correct.
Step-by-Step Setup: Push Notifications for Android & iOS (FlutterFlow + Firebase + Supabase)
Step 0: Prerequisites (if you skip this, iOS will bully you)
Before starting, make sure you have:
A Firebase account
A FlutterFlow project (Android + iOS enabled)
A Supabase project with access to Edge Functions + Secrets
An Apple Developer Account (required for APNs key)
A real Apple Device device for testing (simulator ≠ real life for push)
Expected outcome: You can access Firebase Console, Apple Developer portal, Supabase Dashboard, and FlutterFlow settings.
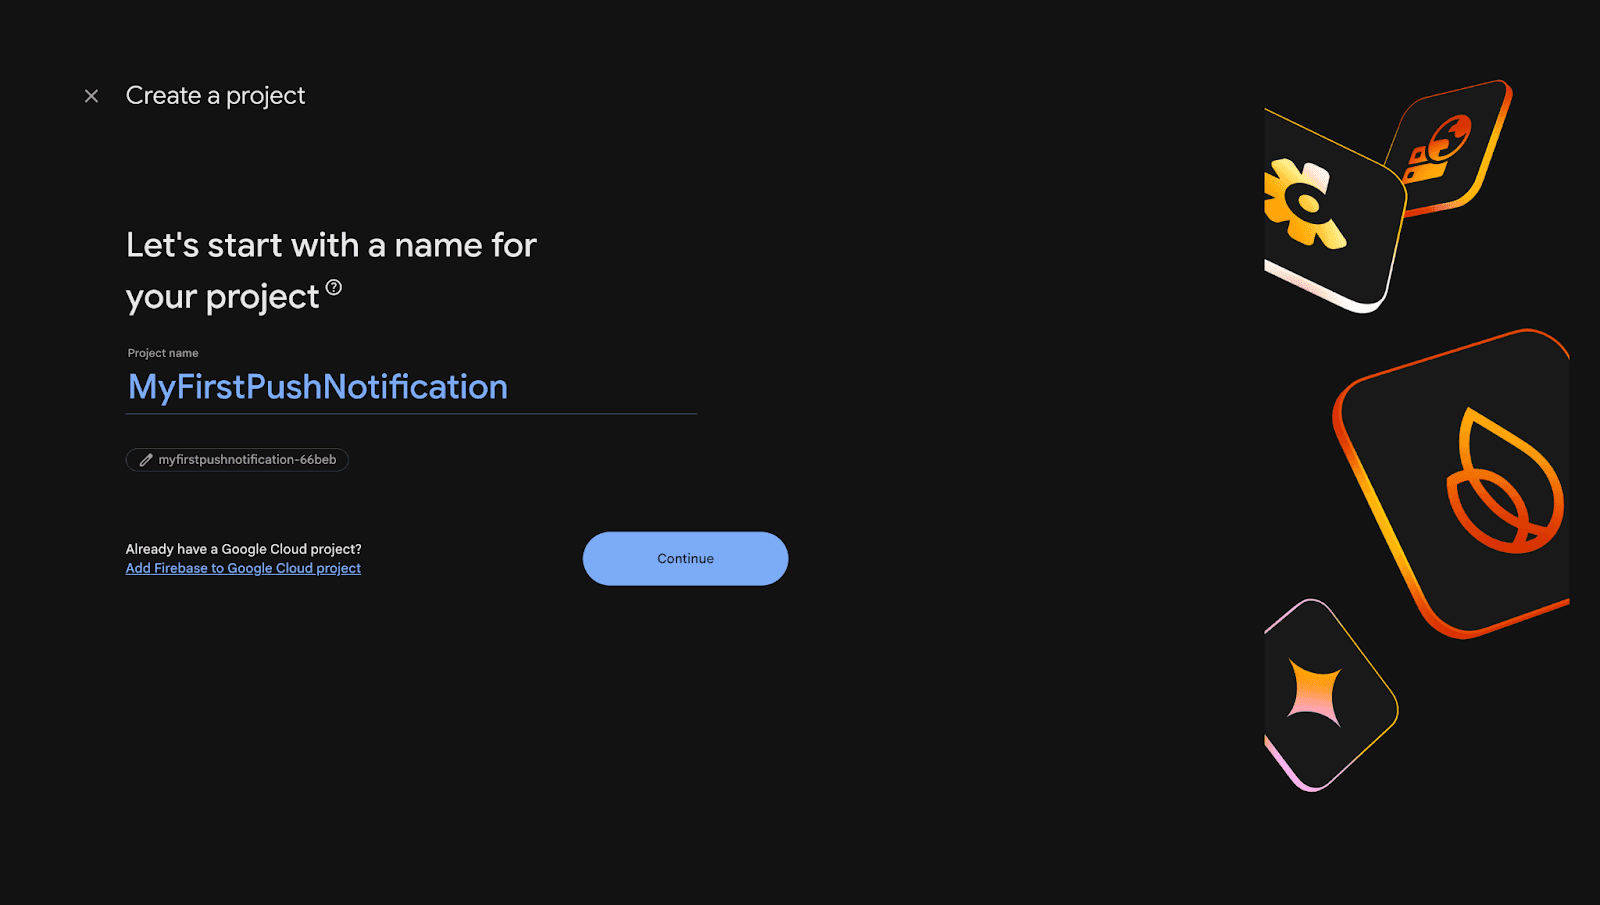
Step 1 : Create a Firebase Project
Open Firebase Console
Click Add project
Give a project name (example:
MyFirstPushNotification)Continue and create the project
✅ Expected result: Firebase creates a new project and takes you into the Firebase dashboard.
Screen Short :
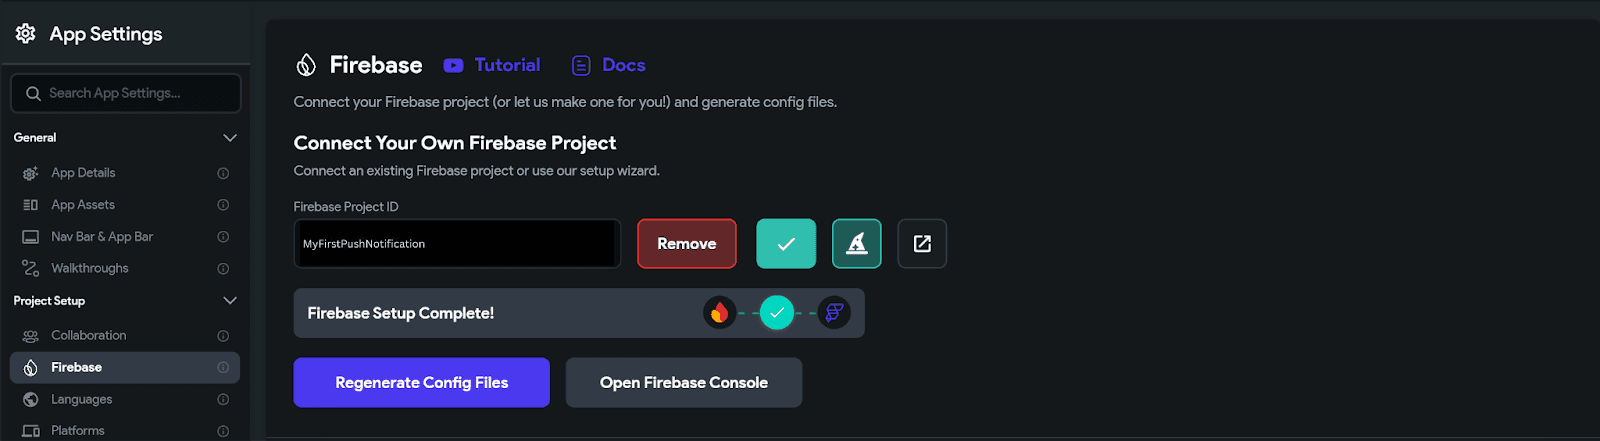
Step 2 : Connect Firebase to FlutterFlow (Generate Config Files)
This is where FlutterFlow links itself to Firebase and creates the Android/iOS apps automatically.
Open FlutterFlow
Go to: Settings → Firebase
In Firebase Console, copy the Project ID
Paste it into FlutterFlow’s Firebase Project ID field
Enable: Enable Performance Monitoring
Click Generate Config Files
✅ Expected result:
FlutterFlow auto-creates required Firebase apps
You will see Android and iOS apps appear inside Firebase under:
You’ll see something similar to your screenshot (your “app created” view)
ScreenShort
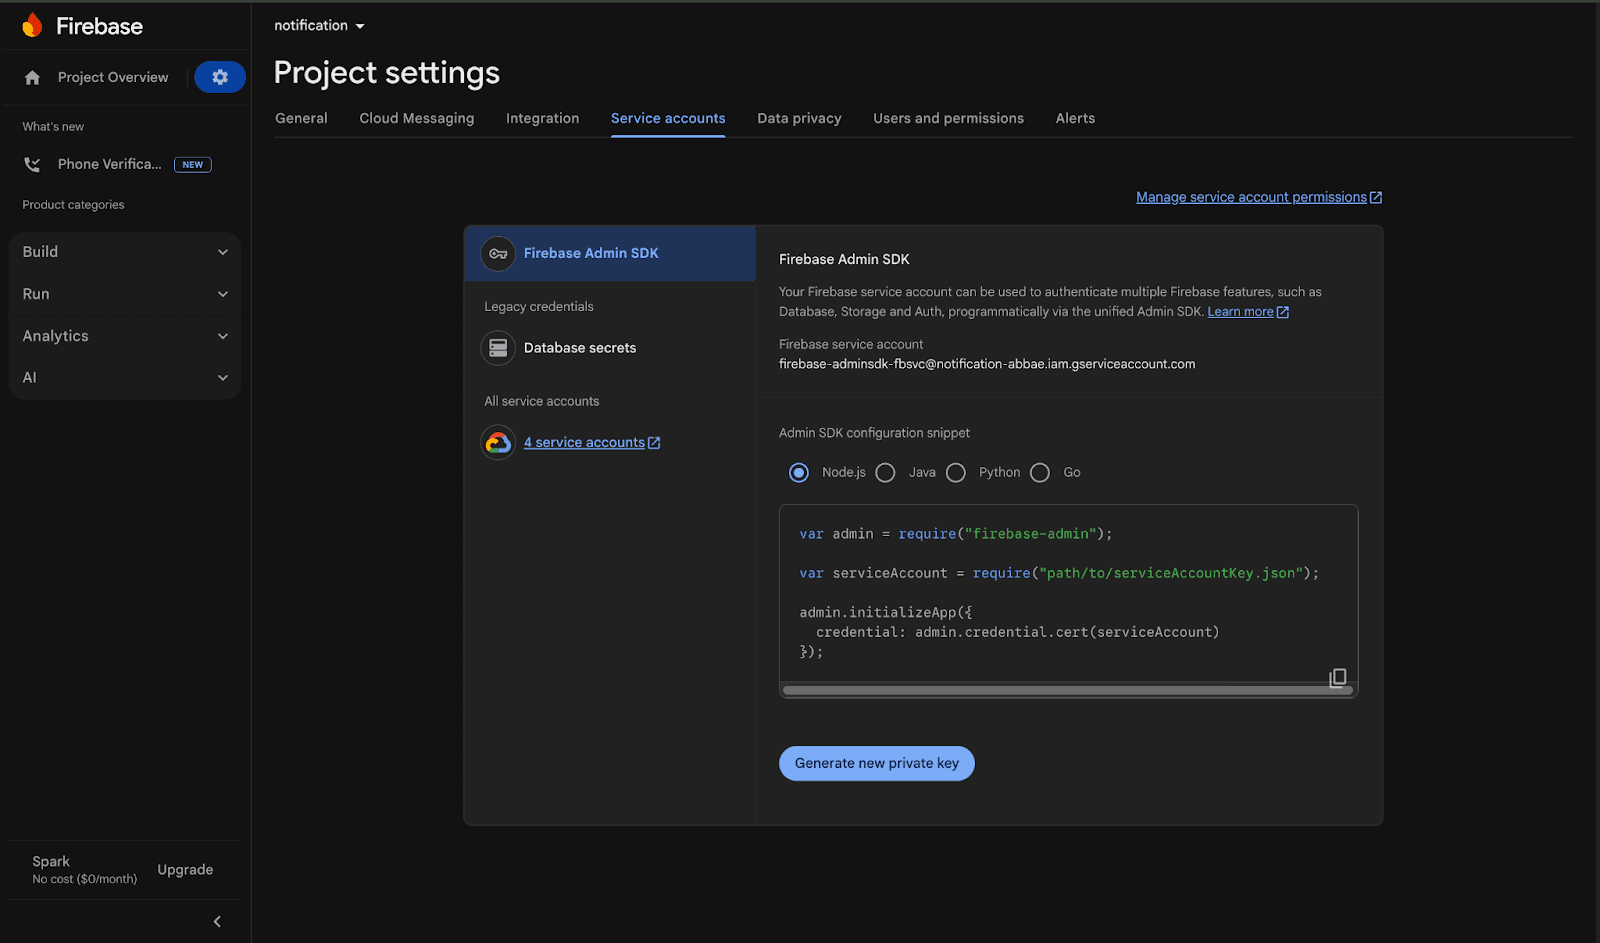
Step 3 : Generate Firebase Service Account JSON (Private Key)
Supabase Edge Functions need server-side permission to call Firebase FCM APIs. That’s why we create a service account key.
Go to Firebase Console
Open:
Click: Generate New Private Key
A
.jsonfile will download
⚠️ Important:
Download happens only when you click it
Store it safely
✅ Expected result: You now have a JSON file containing:
project_idprivate_keyClient_email
Screen Short:
Perfect. Below is your fully updated, production-accurate, blog-ready version of:
Step 4 : Upload APNs Authentication Key to Firebase (REQUIRED for iOS)
iOS push notifications do not work automatically just because Firebase is connected. Apple requires explicit authentication through APNs (Apple Push Notification Service). Without uploading a valid APNs authentication key into Firebase, iOS devices may successfully generate FCM tokens but they will never receive push notifications.
This is one of the most common silent failure points in mobile push notification systems.
If you skip this step, everything will appear correct:
FCM token exists
Supabase RPC runs
Edge function returns success
Firebase responds with 200 OK
But the Apple Device will receive nothing.
Let’s configure this correctly.
4.1 Create APNs Authentication Key in Apple Developer Portal
Step 1 : Open Apple Developer Portal
Go to:
👉 https://developer.apple.com/account
Sign in with your Apple Developer account.
You must have access to:
Certificates, Identifiers & Profiles
Key creation permissions
⚠️ Important Access Note
Only the Account Holder (Apple Developer Account Owner) has full permission to create APNs Authentication Keys by default.
Step 2 : Navigate to Keys Section
From the left sidebar, go to:
Certificates, Identifiers & Profiles → Keys
This section allows you to generate authentication keys for Apple services, including APNs.
Step 3 : Create a New Key
Click the ➕ (Create Key) button.
You will now configure the key.
Key Name
Enter any name for internal reference. For example:
MyApp APNs Key
This name does not affect functionality.
Step 4 : Enable Apple Push Notifications Service (APNs)
From the list of available services:
Check:
✅ Apple Push Notifications service (APNs)
Click:
Continue → Register
Step 5 : Choose Key Type (Production / Development / Both)
You may see three options:
Production Key
Development Key
Both Production and Development Key
Which One Should You Choose?
For Firebase integration, choose:
✅ Both Production and Development Key
Why?
Firebase uses the same APNs authentication key for both environments.
Choosing “Both” prevents environment mismatch errors.
It ensures push works during development testing and after App Store release.
It avoids common signing confusion between debug and release builds.
Best practice: Always select Both Production and Development unless you have a highly specialized enterprise distribution setup.
Step 6 : Download the .p8 File (Critical)
After registering, Apple will allow you to download the key.
⚠️ Important:
The
.p8file can be downloaded ONLY ONCE.If lost, you must revoke the key and generate a new one.
After creation, Apple also displays:
Key ID
You will need both.
4.2 How to Find Your Team ID
When uploading the APNs key to Firebase, you must provide your Apple Team ID.
Here’s how to find it.
Method 1 : From Apple Developer Portal (Recommended)
Click:
Membership (left sidebar)On the Membership page, you will see:
Team Name
Team ID
Example:
Team ID: ABCD123456
This 10-character string is required in Firebase.
Method 2 : From App Store Connect
Click:
Users and AccessYou will see your Team information including Team ID.
⚠️ Important Clarifications:
Team ID ≠ Bundle ID
Team ID ≠ App ID
Team ID does not change unless you change Apple Developer accounts
4.3 Upload APNs Key into Firebase
Now connect Apple APNs authentication to Firebase.
Step 1 : Open Firebase Console
Go to:
Firebase → Project Settings
Step 2 : Navigate to Cloud Messaging
Open:
Project Settings → Cloud Messaging
Scroll to:
Apple app configuration
You will see:
Development APNs authentication key
Production APNs authentication key
If not configured, Firebase will show:
❌ No development APNs auth key
❌ No production APNs auth key
Perfect that’s a good clarification to include 👍
Here’s the corrected and improved version of that section for your blog:
Step 3 : Upload the .p8 File in Firebase
Now that you’ve created the APNs Authentication Key in Apple Developer, you need to upload it into Firebase.
Go to:
Firebase → Project Settings → Cloud Messaging
Scroll to the Apple app configuration section.
You will see two separate upload options:
Development APNs authentication key
Production APNs authentication key
What to Upload
For each section, you must provide:
The
.p8fileKey ID (from Apple key creation page)
Team ID (from Apple Developer → Membership page)
Can You Use the Same .p8 File for Both?
Yes.
Firebase allows you to upload the same .p8 key for both Development and Production environments.
This is the most common and recommended approach when you created the key using:
✅ “Both Production and Development”
Can You Use Different .p8 Keys?
Yes, you can.
If your organization maintains separate keys for:
Development builds
Production (App Store) builds
You may upload different .p8 keys in each section.
However, this is usually only required in complex enterprise setups. For most apps, a single key covering both environments is sufficient.
Screen short :
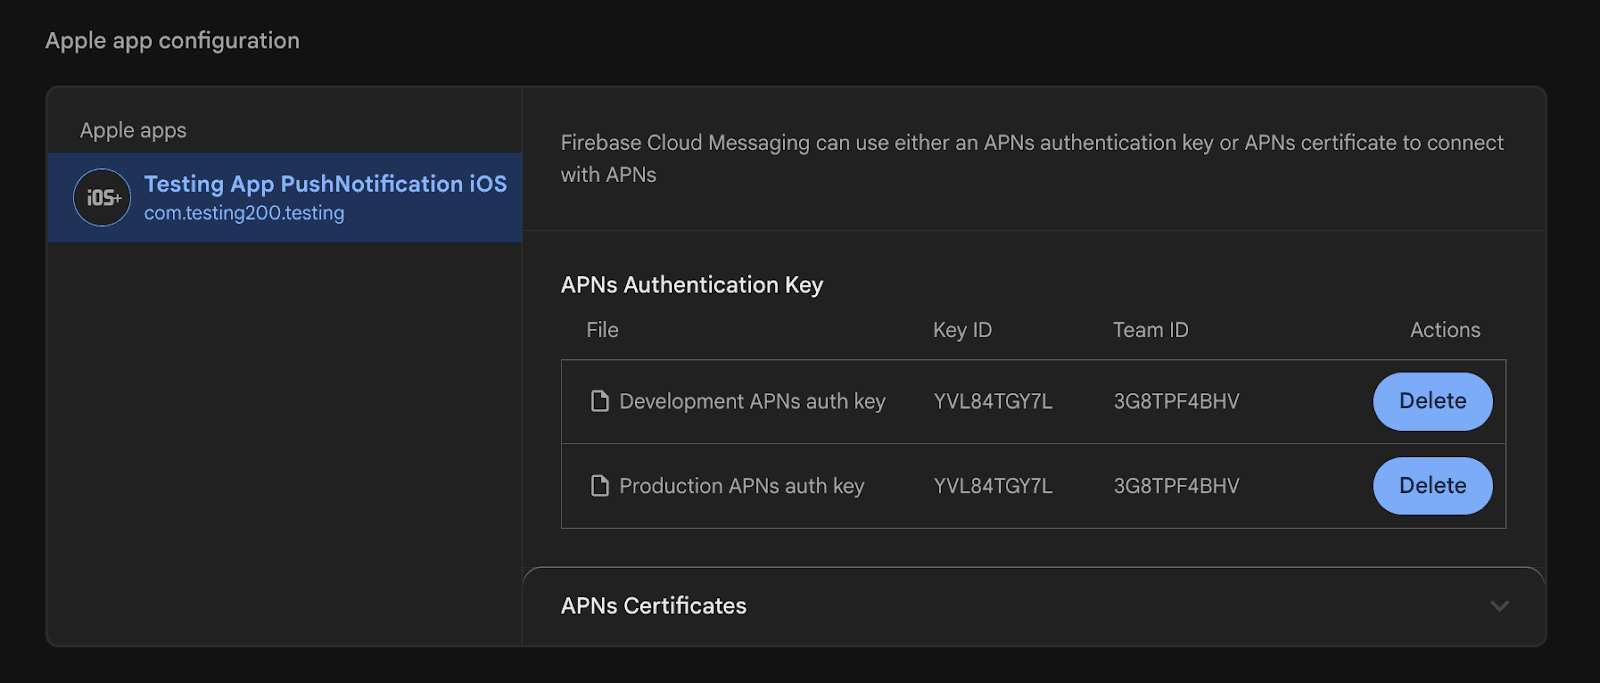
After Uploading
Click Save.
Firebase should no longer show:
❌ No development APNs auth key
❌ No production APNs auth key
Once this is done, iOS push delivery becomes technically possible.
Expected Result After Upload
Firebase no longer shows missing APNs keys
iOS devices can now:
Register APNs token successfully
Receive push notifications from Firebase
Edge Function delivery to iOS begins working
Common APNs Configuration Mistakes
❌ Uploading wrong Team ID
❌ Forgetting to enable APS entitlement in iOS
❌ Selecting only Development key when using Production build
❌ Testing on simulator (push rarely works reliably)
Final Checklist for iOS Push
Before testing, confirm:
.p8key uploaded in FirebaseCorrect Team ID used
Correct Key ID used
Runner.entitlements contains:
<key>aps-environment</key>
<string>production</string>
Testing done on real Apple Device
Why This Step Is Mandatory
Without APNs configuration:
FCM token generation works
Supabase RPC works
Edge function logs success
Firebase returns 200
But…
🚫 iOS device will never receive notification.
This is why APNs setup is not optional - it is foundational for iOS push delivery.
Step 5 : Configure Supabase Secrets (Firebase Credentials)
Now we move Firebase credentials into Supabase securely.
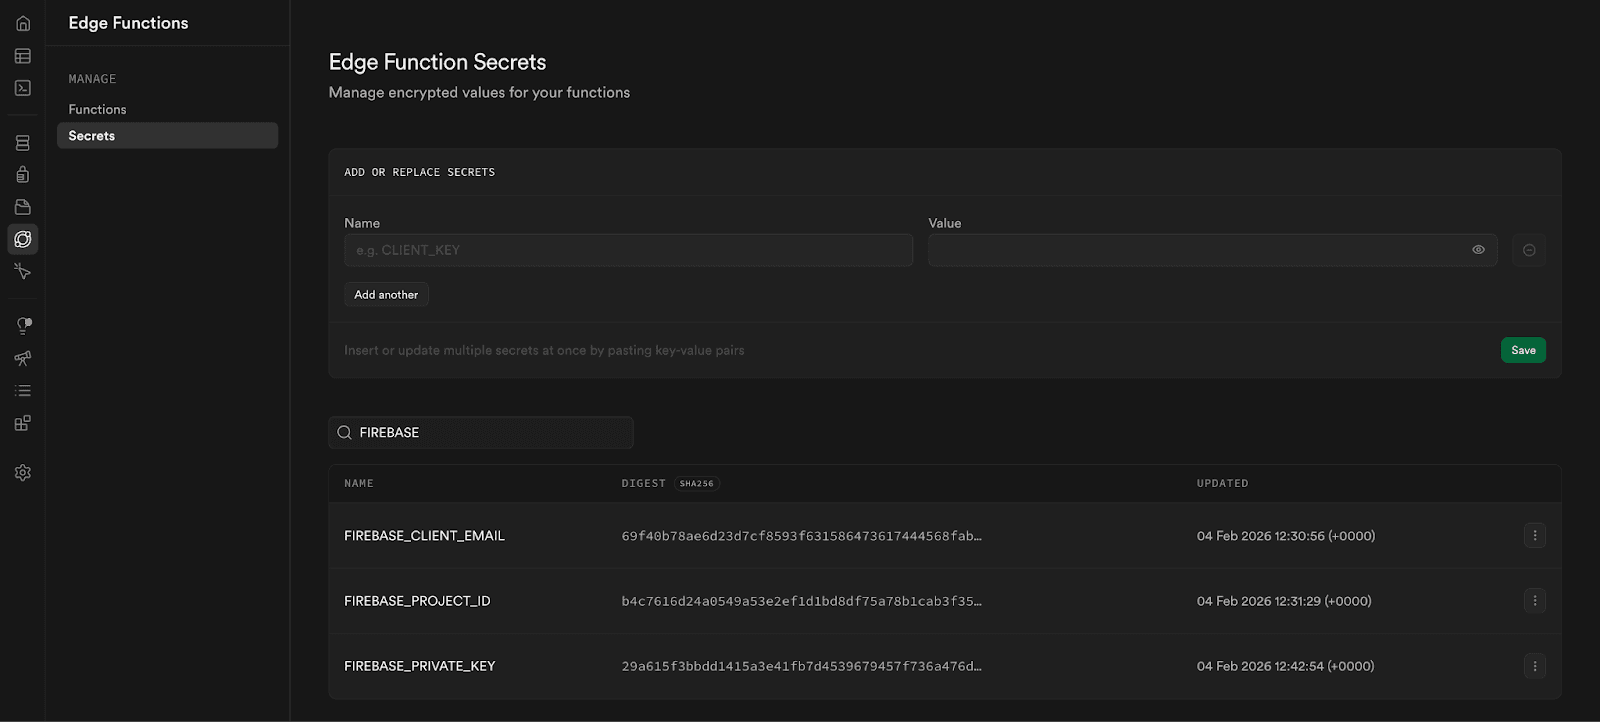
Open Supabase Dashboard → Edge Functions → Secrets
Add these:
FIREBASE_PROJECT_ID= value from JSON →project_idFIREBASE_PRIVATE_KEY= value from JSON →private_keyFIREBASE_CLIENT_EMAIL= value from JSON →client_email
✅ Expected result: Supabase Edge Functions can request Google OAuth token and access Firebase Messaging API.
Screen Short :
Step 6 : Add Required Dependencies in FlutterFlow
Go to FlutterFlow → Custom Code → Pubspec Dependencies
Add:
firebase_messagingflutter_local_notifications
✅ Expected result: Your custom actions compile and notification handling works in foreground.
Screen Short:

Step 7 : Custom Action 1: Fetch & Store FCM Token (setfcmtokennew)
Purpose of this action:
Initialize Firebase
Request permission
On iOS, wait for APNs token
Generate valid FCM token
Get Device Id
Store it in AppState
Save into Supabase table
user_devices
Table schema :
✅ Expected result:
When user logs in / opens app, user_devices gets a row like:
user_id
device_id
fcm_token
(Your setfcmtokennew action does exactly this.)
Best place to trigger it:
After login success
ORApp start (if user already logged in)
Screen Short :
Step 8 : Custom Action 2: Handle Foreground Notifications (setupForegroundNotifications)
The push notification setup we configured earlier works automatically when the app is:
Closed
Running in the background
In those states, the operating system (Android or iOS) automatically displays the notification banner.
However, when the app is open (foreground), Firebase does not automatically show the notification UI. The message is delivered silently to the app through a listener (FirebaseMessaging.onMessage), but nothing appears on the screen unless we manually display it.
To solve this, we use the flutter_local_notifications package.
When a push message is received while the app is open:
The Firebase listener detects the message.
We extract the title and body.
We manually display a local notification using
flutter_local_notifications.
✅ Result
App Closed → Notification shown automatically
App in Background → Notification shown automatically
App Open → Notification shown manually via local notification
This ensures consistent notification behavior across all app states.
Best Place to Trigger
Call setupForegroundNotifications() on:
App Start
orHome Page Load
This ensures the listener is active as soon as the app launches.
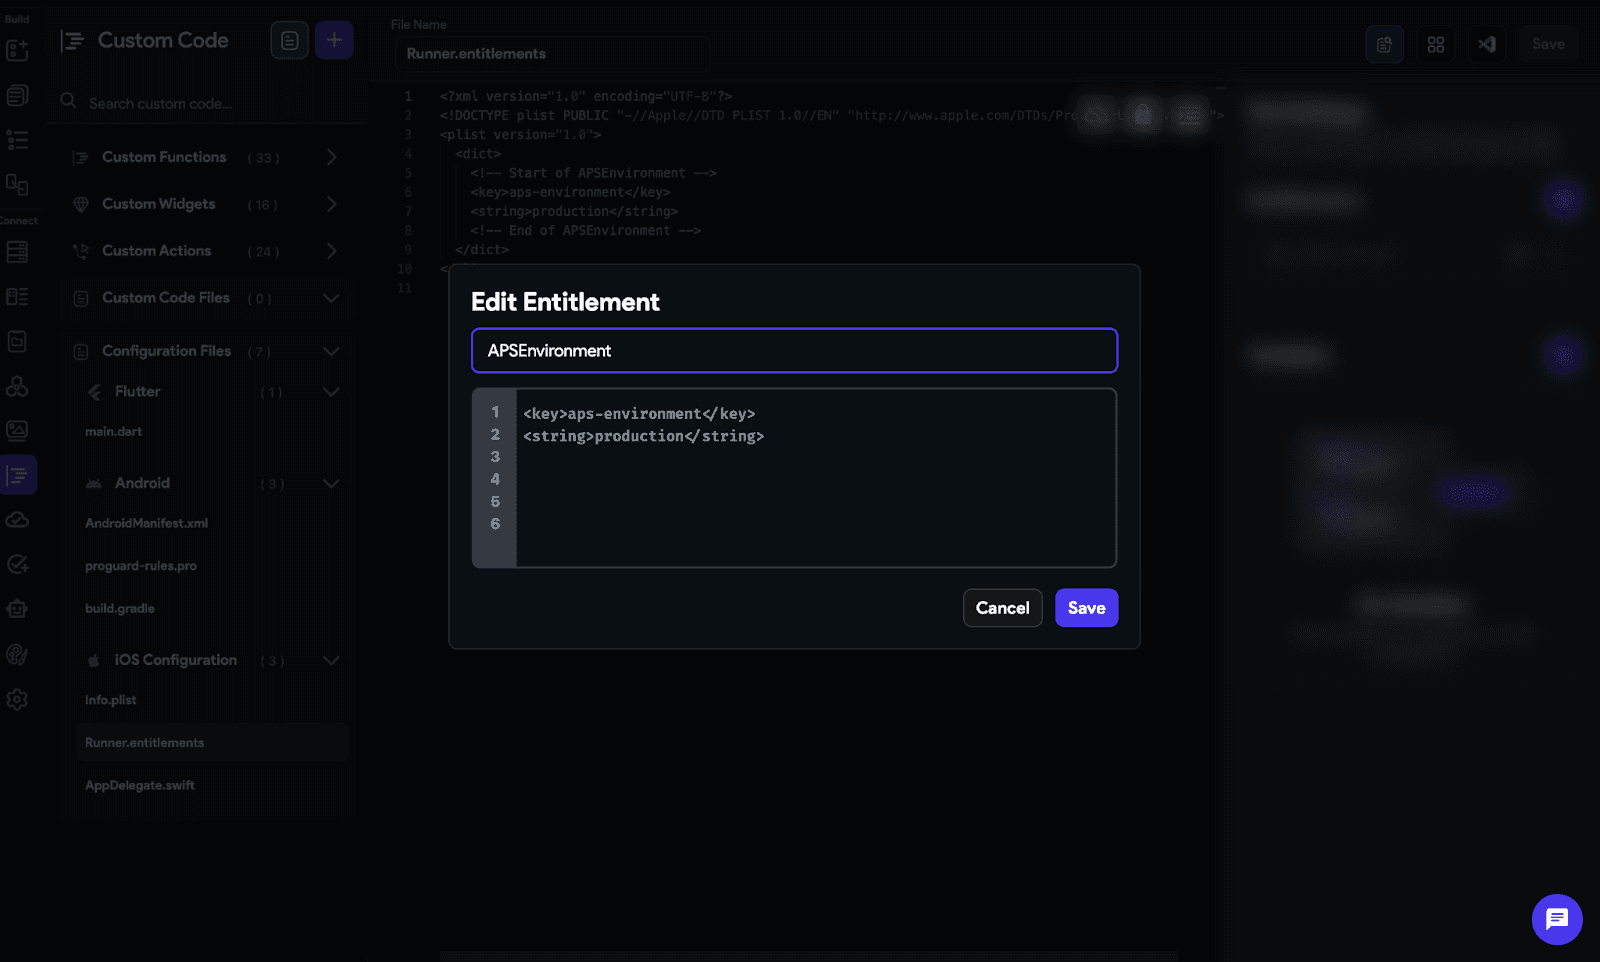
Step 9 : iOS Runner.entitlements Fix (Required)
FlutterFlow needs APS entitlement in iOS build.
Add this into Runner.entitlements in FlutterFlow custom code:
<key>aps-environment</key>
<string>production</string>
✅ Expected result: iOS app becomes eligible to register with APNs.
Screen Short :
Step 10 : RPC Function: Fetch Tokens & Call Edge Function
At this stage, the mobile app is already storing device-level FCM tokens in the user_devices table. Now we need a reliable way to send push notifications from the backend.
This is handled using a Supabase RPC function.
What the RPC Function Does
Your RPC performs the following steps:
Reads FCM tokens from the
user_devicestableFilters by
user_idEnsures tokens are not null or invalid
Builds the notification payload
title
bodyText
deeplink (optional)
push flag
in-app flag
Calls the Supabase Edge Function endpoint
The endpoint being called is:
POST https://<your-project-ref>.supabase.co/functions/v1/send-notification
Example:
https://abcd1234.supabase.co/functions/v1/send-notification
The RPC sends:
Authorization header (Bearer anon key)
x-secret-key (your internal notification secret)
JSON payload containing tokens and message details
Handles Edge Function response
If the Edge Function returns invalid tokens,
the RPC deletes them fromuser_devicesThis keeps your database clean over time
Why Call the Edge Function Instead of Firebase Directly?
We never call Firebase directly from the client.
The flow is:
App → Supabase RPC → Edge Function → Firebase FCM API → Device
This ensures:
Firebase credentials remain secure
All push logic stays server-side
Token validation happens centrally
Notifications can be logged and audited
✅ Expected Result
With this setup:
A single RPC call can trigger push notifications
Multiple devices per user are supported
Invalid tokens are automatically cleaned
Delivery logic remains secure and scalable
This creates a production-ready push notification pipeline fully controlled by your backend.
Step 11 — Deploy Supabase Edge Function: send-notification
Once your RPC is ready, the final piece of the push pipeline is the Supabase Edge Function.
This function is responsible for securely communicating with Firebase Cloud Messaging (FCM) using the FCM v1 API.
Edge Function Endpoint
After deploying the Edge Function, Supabase automatically generates an endpoint:
POST https://<your-project-ref>.supabase.co/functions/v1/send-notification
Example:
https://abcd1234.supabase.co/functions/v1/send-notification
This is the endpoint your RPC function calls internally.
What This Edge Function Does
The send-notification function performs several critical operations:
1️⃣ Validates the Secret Key
It checks the custom header:
x-secret-key
If the key does not match the expected value stored in Supabase Secrets (NOTIFICATION_SECRET_KEY), the request is rejected.
This prevents unauthorized systems from triggering push notifications.
2️⃣ Gets Firebase OAuth Access Token
Using the secrets stored in Supabase:
FIREBASE_PROJECT_IDFIREBASE_PRIVATE_KEYFIREBASE_CLIENT_EMAIL
The Edge Function:
Generates a signed JWT
Exchanges it with Google OAuth
Retrieves a temporary access token
This allows secure communication with the Firebase FCM v1 API.
3️⃣ Sends Push via FCM v1 API
The function sends the request to:
https://fcm.googleapis.com/v1/projects/<project-id>/messages:send
For each valid token, it constructs:
Notification title
Notification body
Android configuration
APNs configuration (for iOS)
Optional deeplink data
It sends the message individually to each device token.
4️⃣ Handles Invalid Tokens
If Firebase returns errors such as:
UNREGISTERED
INVALID_ARGUMENT
NOT_FOUND
The function flags those tokens as invalid.
Your RPC then removes them from the user_devices table, keeping your system clean.
Complete Push Flow
At this stage, the flow becomes:
App
↓
Supabase RPC
↓POST https://<project-ref>.supabase.co/functions/v1/send-notification
↓Firebase FCM v1 API
↓Android / iOS Device
✅ Expected Result
If everything is configured correctly:
Android receives push immediately
iOS receives push (only if APNs key was uploaded correctly in Firebase)
Foreground notifications are shown using
flutter_local_notificationsInvalid tokens are automatically cleaned
This completes a secure, production-ready push notification pipeline using FlutterFlow + Firebase + Supabase.
Step 12 : End-to-End Testing Checklist (Real devices only)
✅ Test Android:
Install app
Login
Confirm
user_deviceshas FCM tokenSend push → should arrive
Screen Short :
✅ Test iOS:
Install on real Apple Device
Ensure permission granted
Confirm APNs token exists in logs
Confirm FCM token stored
Send push → should arrive
Screen Short:
Common Push Notification Issues in FlutterFlow (And How to Fix Them)
Setting up push notifications in FlutterFlow is usually straightforward once Firebase, Supabase, and platform-specific configurations are connected correctly.
However, a few common issues can prevent notifications from working as expected. Understanding these problems can save hours of debugging during development and testing.
Notifications Work on Android but Not on iOS
This is one of the most common issues developers encounter.
In most cases, the problem is related to:
Missing APNs configuration
Incorrect Apple Push Notification certificates
Improper iOS capabilities setup
Incorrect Bundle ID configuration
Before testing on iOS, verify that APNs has been configured correctly in both Apple Developer settings and Firebase.
Device Tokens Are Not Being Stored
Push notifications rely on device tokens to identify where notifications should be delivered.
If tokens are not being saved:
Check Firebase Cloud Messaging setup
Verify notification permissions are granted
Confirm the token is being written to your database
Ensure user records are updated after login
Without a valid device token, notifications cannot be delivered successfully.
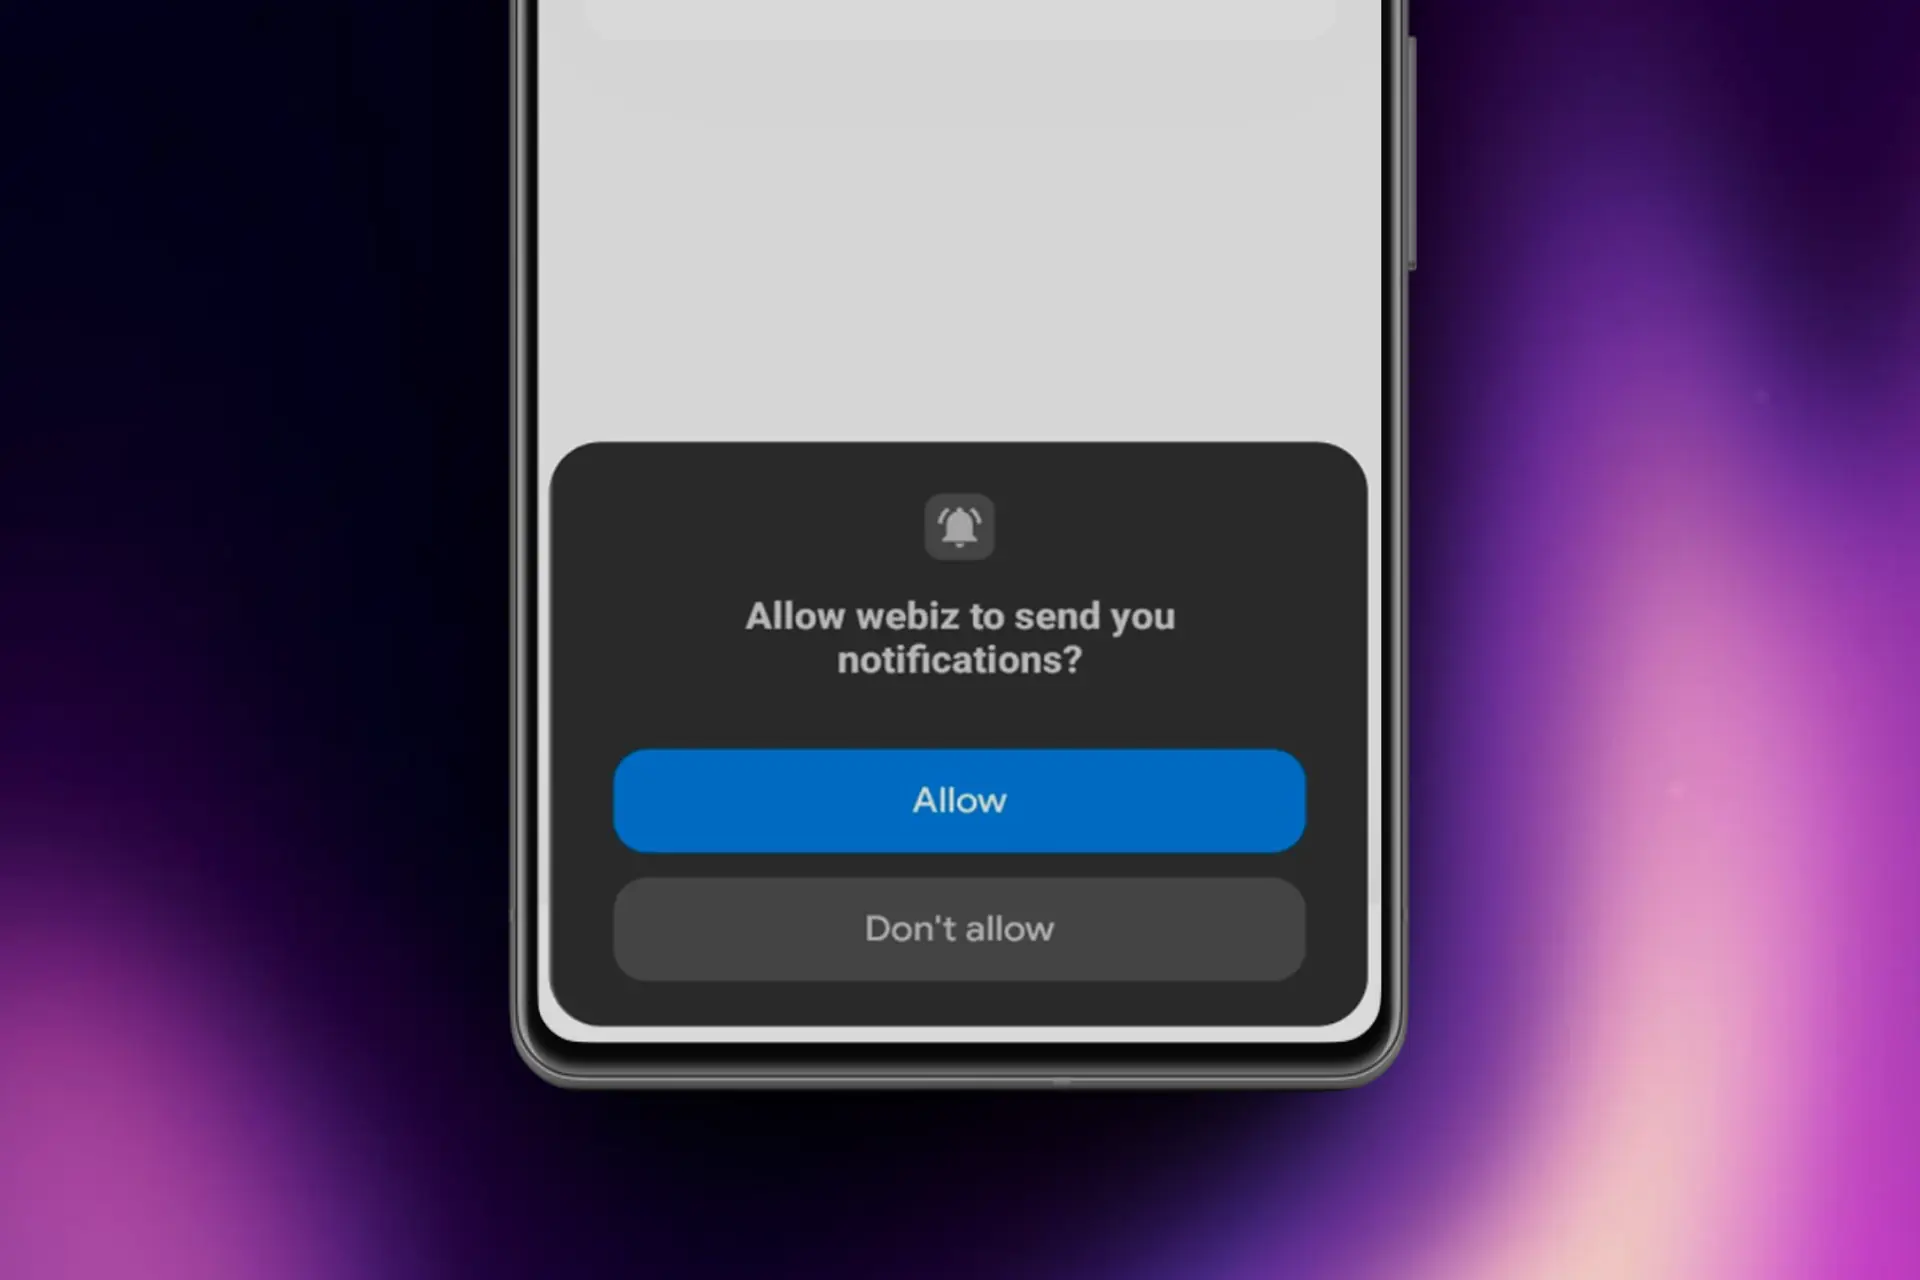
Notification Permission Prompt Never Appears
A missing permission request often leads developers to believe notifications are broken.
Check that:
Notification permissions are requested during onboarding or login
Users have not previously denied permissions
Device settings allow notifications for the application
Testing on fresh installs often helps identify permission-related issues.
Notifications Are Sent but Never Received
If notification requests are successful but devices never receive them, review:
Firebase project configuration
Server keys and credentials
Device token validity
Notification payload formatting
Background execution settings
Many delivery issues stem from outdated or invalid device tokens.
Background Notifications Behave Differently
Android and iOS handle background notifications differently.
Some notifications may:
Appear only when the app is active
Be delayed by operating system restrictions
Behave differently depending on battery optimization settings
Testing across multiple devices is important before releasing a production application.
Supabase Trigger or Edge Function Errors
When using Supabase to automate notification delivery, issues often occur when:
Database triggers fail
Edge functions are misconfigured
API credentials are incorrect
Notification payloads contain invalid data
Monitoring logs regularly helps identify and resolve these problems quickly.
Best Practice: Test Early and Often
Push notifications involve multiple systems working together:
FlutterFlow
Firebase Cloud Messaging
Supabase
Android
iOS
Because of this, small configuration mistakes can cause unexpected issues.
The best approach is to test notification delivery throughout development rather than waiting until launch. This helps identify platform-specific problems early and ensures a smoother production rollout.
Why CloseFuture Is the Right App Development Partner for Your Startup
Startups don’t just need an app built fast they need the right app built with clarity, scalability, and a launch-ready mindset. CloseFuture helps founders go from idea to production without chaos, by blending design precision, technical depth, and startup-focused execution.
Notable Works : Webiz, Spendy, Vigo, SquaDD
Proven Global Expertise
CloseFuture is a top FlutterFlow team in 2026, building real apps across SaaS, marketplaces, EdTech, FinTech, and consumer products with MVP-to-scale foundations that hold up.
End-to-End App Delivery
We cover everything from validation and UI/UX to FlutterFlow build, backend, QA, and deployment with smooth Supabase/Firebase/API integrations for scalable automation.
Built for Startup Growth
Fast MVP delivery, fixed transparent pricing, and post-launch support to refine UX, ship new features, and scale confidently.
Conclusion
Push notifications are a core part of modern app architecture, enabling real-time communication and event-driven engagement across Android and iOS. Building a reliable system requires more than frontend integration it demands secure backend orchestration, proper APNs setup for iOS, and structured device token management.
Using FlutterFlow, Firebase Cloud Messaging, and Supabase, we created a scalable, production-ready notification pipeline. By separating logic into RPC and Edge Functions and centralizing credential handling, the system remains secure, maintainable, and fully backend-driven — built to scale with your app from day one.
CloseFuture checks every one of those boxes, offering a blend of design precision, development speed, and startup-first processes. If you want a partner who understands your vision and can help you execute it at a world-class level, CloseFuture is the team that turns your idea into a product people love.
Ready to start your FlutterFlow project?
Schedule a free consultation with CloseFuture, your expert partner for building high-performance apps in 2026.
Q1. Why shouldn’t I send push notifications directly from FlutterFlow without using Supabase?
Sending notifications directly from the client creates security risks and exposes business logic. Using Supabase RPC and Edge Functions keeps everything server-side, protects credentials, and ensures proper validation and access control.
Q2. Why does Firebase return success but my iOS device receives nothing?
Most cases are due to incorrect APNs configuration. iOS requires a valid APNs .p8 key with correct Team ID and Key ID in Firebase. If misconfigured, Apple silently rejects the notification—even if Firebase shows 200 OK. Always test on a real device with proper entitlements.
Q3. Can I use the same APNs .p8 key for development and production builds?
Yes. A single .p8 key can support both environments if created with Production and Development enabled. Upload it to both sections in Firebase Cloud Messaging to avoid environment mismatch issues.
Q4. Why are notifications not visible when the app is open?
When the app is in the foreground, Firebase delivers messages silently without showing UI. You must manually trigger a local notification (e.g., using flutter_local_notifications) inside the on Message listener to display alerts while the app is open.
Q5. Why use both RPC and Edge Functions instead of only an Edge Function?
RPC manages database logic like token retrieval, validation, and RLS enforcement. The Edge Function handles communication with Firebase. Separating responsibilities improves security, modularity, and maintainability.
Q6. What happens when device tokens become invalid or expire?
Tokens can expire due to reinstalls or OS refresh. Firebase returns errors like UNREGISTERED for invalid tokens. The Edge Function detects failures and removes invalid tokens from the database, keeping the system clean and efficient.